Step-by-Step Guide: Creating a Bootable USB from an ISO Image using PowerShell
Embarking on the journey to create a Windows bootable USB installer can often seem daunting, particularly when the convenience of an Internet connection is absent to download the necessary software for creating bootable media. However, there’s a silver lining – PowerShell. Bundled with the most recent iterations of Windows, PowerShell is a powerful tool that is capable of accomplishing this task without requiring any extra software installations. It serves as an efficient, built-in solution for your bootable USB creation needs.
Essential Components for Crafting a Windows Bootable USB: What You Need
1. A Minimum of 8GB USB Flash Drive: Ensure sufficient space for the Windows ISO files with a flash drive of at least 8GB.
2. The Latest Windows ISO File: Keep your system up-to-date by using the most recent Windows ISO file.
3. A Windows OS with PowerShell 4 or Above: Compatibility is key – make sure your Windows version comes equipped with PowerShell 4 or higher to facilitate this process.
Getting Your USB Ready: Steps to Follow
After successfully meeting the prerequisites outlined above, it’s time to proceed to the next stage. Begin by plugging in your USB flash drive into your computer. Following that, execute the below command to fetch the drive number as well as other pertinent details relating to your flash drive.
Get-Disk | where BusType -eq 'USB'

Up Next: Clearing the USB Flash Drive
Moving forward, our next step involves executing a command to clear the contents of your USB Flash drive. This process ensures that your flash drive is primed and ready for the upcoming bootable media creation. Please follow along with the command given below.
Clear-Disk -Number 1 -RemoveData -Confirm:$false -PassThru
Setting the Stage: Formatting Your USB Flash Drive
Having successfully cleared your USB, the subsequent action involves establishing a partition and formatting it utilizing the NTFS file system. This process can be accomplished by executing the command outlined below in your PowerShell console. Remember, every step brings you closer to creating a fully functional bootable USB from your ISO.
New-Partition -DiskNumber 1 -UseMaximumSize -AssignDriveLetter | Format-Volume -FileSystem NTFS

Progressing Forward: Mounting the Windows ISO File
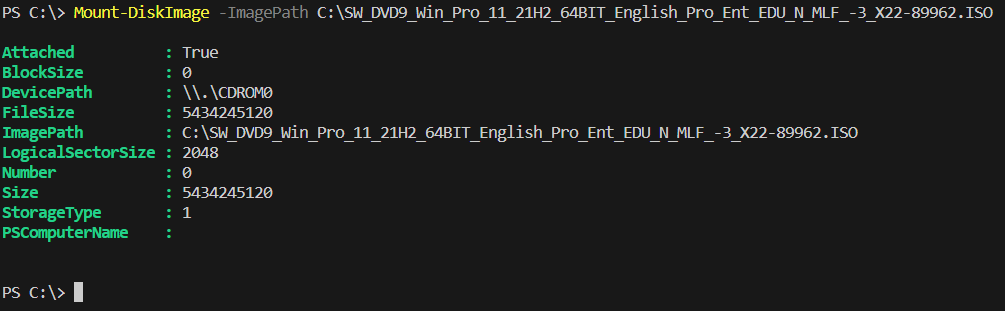
Having successfully formatted your USB Flash Drive using the NTFS file system, it’s now time to mount the Windows ISO file. This crucial step can be accomplished by executing the subsequent command. Following the steps accurately will ensure the creation of your bootable USB without any hitches.
Mount-DiskImage -ImagePath "c:\win10.iso"
Moving Ahead: Determining the Drive Letter for Your Windows ISO File
Our subsequent step involves identifying the Drive Letter that has been assigned to your Windows ISO file. This can be achieved by running the command below. Understanding the correct Drive Letter is crucial to the successful creation of your bootable USB.
Get-CimInstance Win32_LogicalDisk | ?{ $_.DriveType -eq 5} | select DeviceID

Transferring Data: Copying from ISO to USB
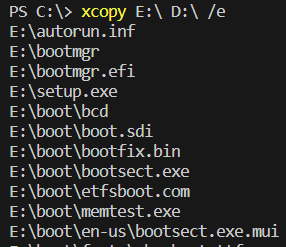
As we progress, our next step involves running the ‘xcopy’ command. This command allows us to copy all content from the mounted Windows ISO file to our USB drive. Performing this action accurately is a critical component of creating a successful bootable USB.
xcopy E:\ D:\ /e
Patience is Key: Await the Copying Process
With the command executed, the copying process is now underway. Transferring all the files to your USB flash drive might take some time depending on your system and the file size. So, sit back, relax, and let PowerShell do the heavy lifting for you as it creates your bootable USB.
Congratulations! Your Bootable USB is Ready for Use
Well done! Your patience and careful execution have paid off. You now have a fully functional, bootable USB drive that can be utilized to install Windows. Whether you’re setting up a new system or updating an existing one, this handy tool is ready to serve your needs.